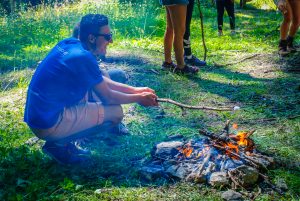
Knowing how to build a campfire can make a big difference to a camping experience! Some of the most treasured moments of camp can be sitting round the campfire you have just made with your friends, toasting the perfect marshmallow, or sat at an evening campfire with the whole camp telling stories and celebrating achievements from the week before.
Building campfires is one of our campers favourite activities, not only is it a great outdoor skill to learn but it also comes with a whole host of other learning outcomes; as well as a sense of achievement and accomplishment.
A safe place for building your fire
The first step is ensuring your build your fire in a safe place, as well as a place that will aid you in lighting the fire as much as possible. The risk of wildfires in the summer in many forested or grassy areas is high. Make sure you clear an area; ideally there will be bare soil in the area, and you can create a safe boundary for your fire with small rocks to keep it contained, as well as being sheltered from the wind. Make sure there is nowhere the fire can spread to once lit, for example dry grass can easily catch fire. Also ensure there is no fire ban in your area before you decide to light a fire.
Selecting the right fuel for your fire
First select tinder; the smallest and most flammable fuel to get your fire started, followed by kindling and then larger pieces of wood for fuel.
Tinder needs to be very thin shredded material, such as dry ‘old mans beard’, dry pine needles, dried grass, or some types of dried bark. It is hardest to find when the forest floor is damp but this is also when it is most important. Alternatively a supply of matches can act as tinder, or take some with you on damp days. You can create your own by shaving the inside of a log if you are struggling to find dry tinder.
Kindling is the next step up from tinder, and the heat from the tinder will get the kindling burning. This is splinters of wood, small sticks. Remember only use fallen wood from the forest floor rather than breaking from living shrubs or trees; the dry dead wood will burn more easily, as well as protecting the environment. All wood should ‘snap’; if it bends it is too moist to burn.
Fuelwood for a campfire is the final step up; start with smaller pieces of wood, twigs and once your fire is going with a bit more heat you’ll be able to use larger pieces of wood. You’re not looking to burn anything thicker than the width of your wrist, as a rule.

Techniques for building your fire
The two most common types of fire are the ‘tipi’ and ‘log cabin’; both built to allow air to circulate and for the tinder to allow the kindling to catch light.
For the tipi: start by laying your tinder in a small bundle on the ground. Around this use 3 or 4 larger kindling sticks to form the structure and lean smaller kindling around this, leaving an opening for you to access the tinder. You can then lean some smaller fuelwood against this structure.
For a log cabin: start in the same way as a tipi with the tinder and a small tipi around this with kindling. Then lay two pieces of fuel wood on either side, and then another two pieces in the opposite direction to form the 4 walls of your ‘cabin’ Continue to lay slightly smaller pieces to build your cabin taller, and then lay some pieces of kindling over the top.
Lighting your fire
Position yourself between the wind and the fire to act as a wind break. Light underneath the tinder using your match; this can be easier with the tipi than the log cabin as access, so make sure you are able to get to your tinder easily when building. Hold onto your match while you are lighting rather than letting it go.
Extinguishing your fire
Ideally, and depending on how large your fire is, extinguish your fire about 30 minutes before you leave. If you are putting out a burning fire then spread the fire with a stick to put out the flames. After this, pour water on the coals and stir the together when you have wet the entire area. Use your hand above the coals to make sure there are no hot spots; if there are wet with more water. Take the coals/ash and spread in the woods away from the trail, especially for larger fires. Any unused wood can be scattered back in the woods, or left if this is a regular fire spot.
Building a fire is a popular activity on our mountain adventure camps which are available as day camps and residential camps.


